How to remove password from Excel file
This tutorial shows how to remove password from Excel files using multiple methods. Some methods work even if you don’t know the password.
Whenever you send out an Excel file that you don’t want to be changed, it’s essential to protect the worksheets with a password. However, you will also need to be able to remove the password if you want to make changes later on. In this tutorial, you will learn how to:
- Remove password from Excel file if you know the password
- For PC users
- For Mac users
- Remove password from Excel workbook if you forgot the password
- Remove password from Excel workbook using an Online Service (like password-find.com)
- Remove password from Excel workbook using a 3rd Party Software
How to remove password protection from Excel workbook if you know the password
If you are the one who set the password or you were given the password to the Excel file via email, then you can follow a few simple steps to remove it.
Remove Excel spreadsheet password from the Info panel
1. Open the encrypted Excel file for which you want to remove the password.
2. Enter the Excel password and click OK.
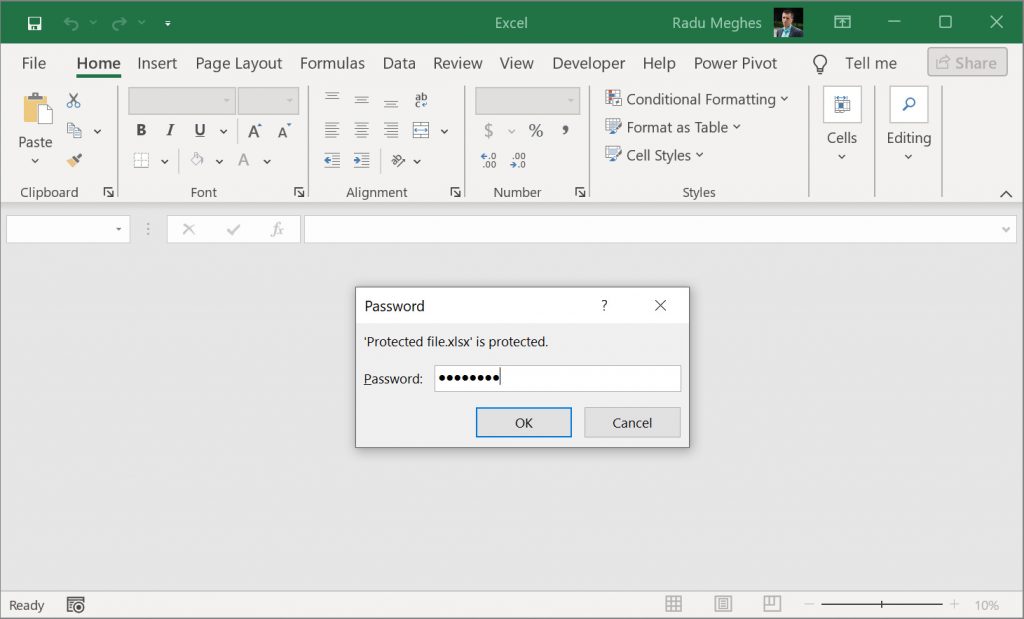
3. On the upper left corner of the opened Excel spreadsheet, click the File tab.
4. In the left-hand panel, click Info and Protect Workbook to open the drop-down menu.
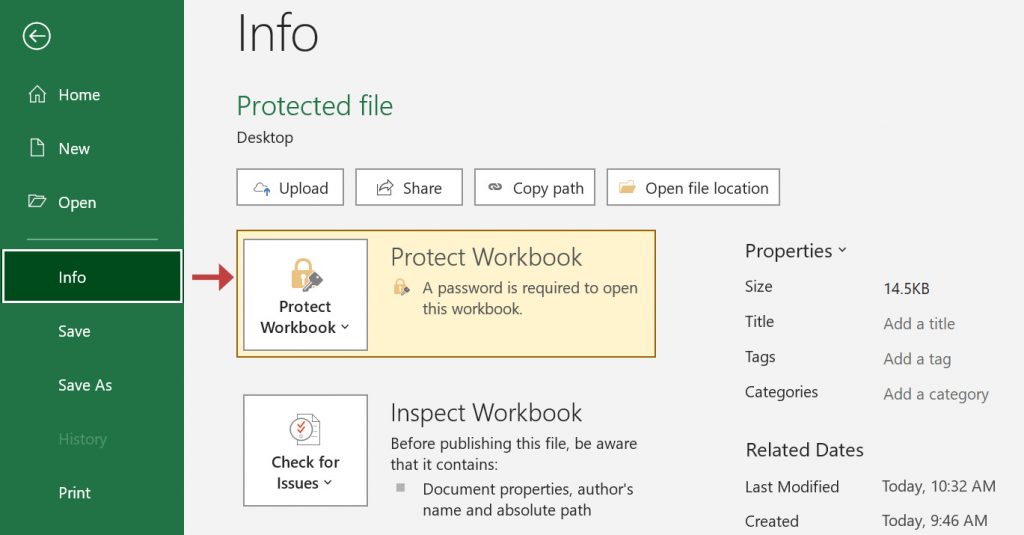
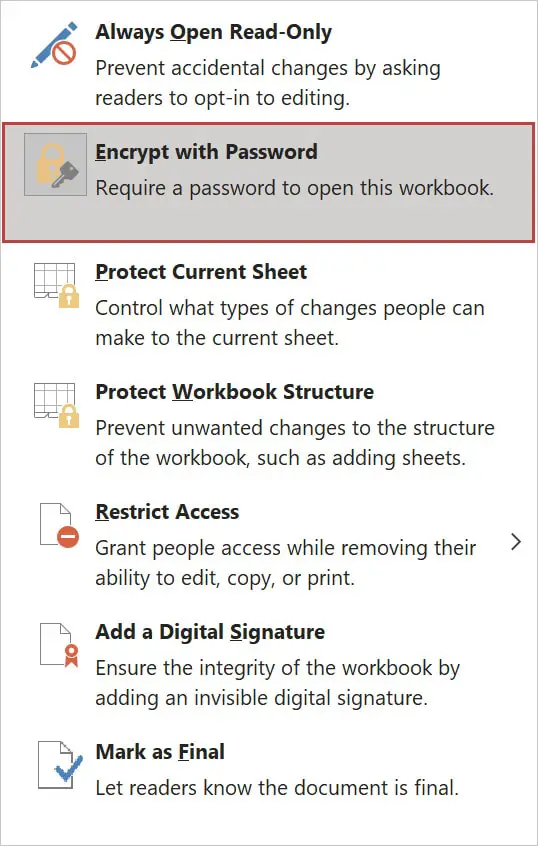
5. Select Encrypt with password in the drop-down list and delete the password that appears in the text field.
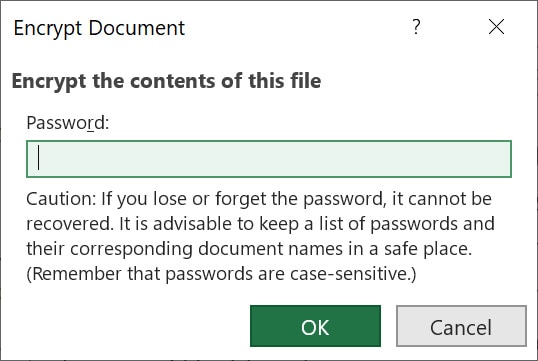
7. Delete the existing password and click OK.
6. Go to the File menu and click Save.
Remove Excel password from the Review tab
1. Open the encrypted Excel file for which you want to remove the password.
2. Enter the Excel password and click OK.
3. On the main ribbon menu of the opened Excel spreadsheet, click the Review tab.

4. Click the Unprotect Sheet option and enter the password.
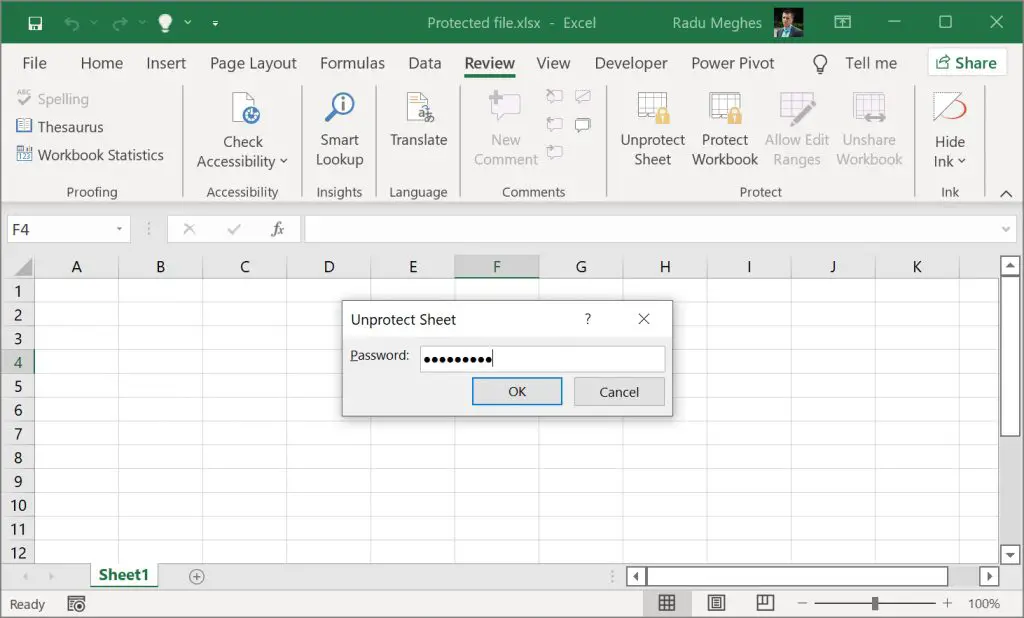
5. To remove the password from the workbook but keep it locked from editing, select Protect Sheet and click OK without entering a new password.
6. Go to the File menu and click Save.
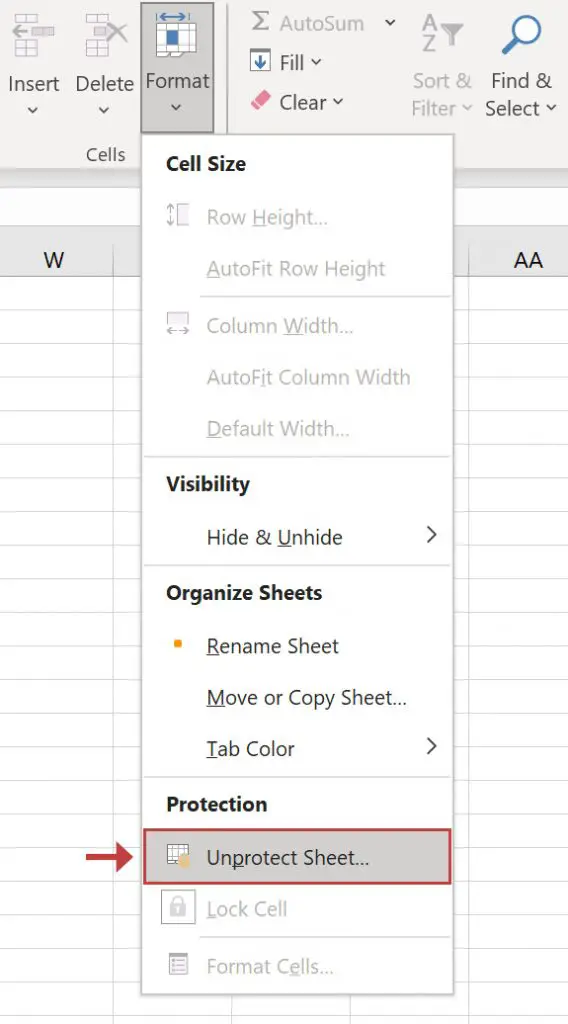
Alternatively, you can unprotect the sheet and remove the password from the Home tab using the Format menu.
Remove Excel password using the Save As method
1. Open the encrypted Excel file for which you want to remove the password.
2. Enter the Excel password, and then click OK.
3. On the upper left corner of the opened Excel spreadsheet, go to the File tab and select Save as.
4. Select a folder, and a pop-up window will appear.
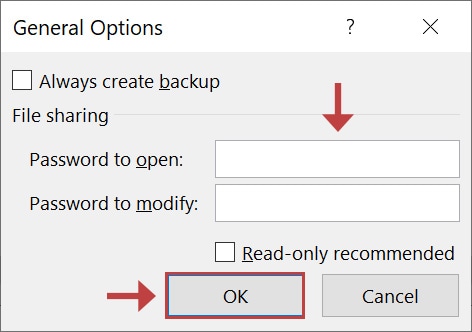
5. Click Tools located at the lower right side of the window. Click the drop-down menu and select General Options.
6. The General Options dialog box will appear, which shows the encrypted passwords to open and edit the Excel file. Remove the passwords for both text fields and click OK.
7. Go to the File menu and click Save.
For Mac users
1. Open the Excel file for which you want to remove the password.
2. Enter the Excel password, and then click OK.
3. On the upper left corner of the opened Excel spreadsheet, click the File tab and select Passwords from the drop-down list.
4. The File Passwords dialog box will appear, showing the encrypted password to open and edit the excel file. Delete the passwords for both text fields, and then click OK.
5. Go to the File tab in the menu bar, and then click Save.
How to remove password from Excel workbook without the password
If you want to open an Excel file but don’t know the password, you can follow one of the below processes. You can also try using a 3rd party software if other methods have failed.
Always create a backup copy of your Excel files before attempting to remove the password.
Converting an Excel file into a Zip file
Below you can watch a video that shows this process step-by-step. I have also listed all the steps needed to remove the protection of your Excel file without using any additional software.
Note: This method doesn’t work in all versions of Excel. Some say that it stopped working in Microsoft 365, but I’ve seen people complaining about Excel 2016 as well. If you can’t use this, try one of the other methods shown below.
1. Right-click on your document and convert the file by renaming the extension from “.xlsx” to “.zip”.
2. You will get a warning asking if you want to change it. Click Yes.
3. To extract the zip file’s contents, right-click on the file and select Extract All.
4. A window will appear showing the folder where the files will be extracted. Click Extract.
5. In the extracted file, open the “XL” folder.
6. Inside the “XL” folder, open the “worksheets” folder.
7. You will see a list of XML files which are all your Excel worksheets within your password-protected Excel spreadsheet. The worksheets are listed as sheet1.xml, sheet2.xml, and so on.
8. To modify the XML file, open one XML file in notepad and search for a line with the word “protection”.
9. Select everything between and including these “<” and “>” characters and delete it.
10. Click the File menu in the notepad and click the Save button.
11. Repeat this process for every XML file within your Excel spreadsheet inside the “worksheets” folder. Make sure that all XML files are modified.
12. To add your modified XML files back into your zip file, go back to the extracted file and select all the files.
13. Right-click and select Send to > Compressed (zipped) folder.
14. This will create a new zip file. Rename the file extension from “zip” to “.xlsx”.
15. You will get a warning asking if you want to change it. Click Yes.
16. Open the Excel file.
You should now have access to view and edit the Excel data and information stored in your spreadsheet without typing the password.
How to remove password from Excel workbook using an Online Service
You can also use online services like Password-Find to remove passwords from your Excel spreadsheets. Unlike 3rd party software, most of these online services work on Mac, Windows, Android, Unix, and iOS.
Using Password-Find to remove Excel passwords
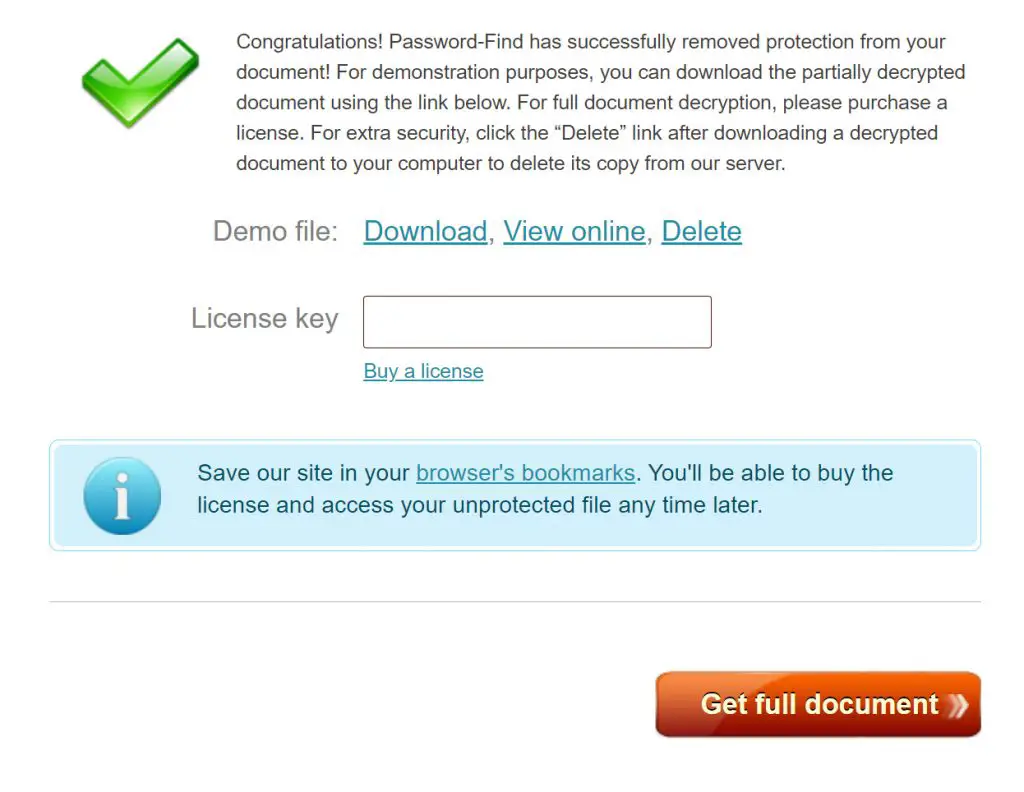
Please note that this is a paid service, and to get a full copy of your file after the password has been removed, you may need to purchase a license key.
Here’s a quick guide on using the Password-Find online service to recover or remove passwords from Excel files.
1. Go to https://www.password-find.com
2. From the home page, click Unprotect your file in the upper right corner.

3. In the file upload page, click Browse to select a file and click Next step.
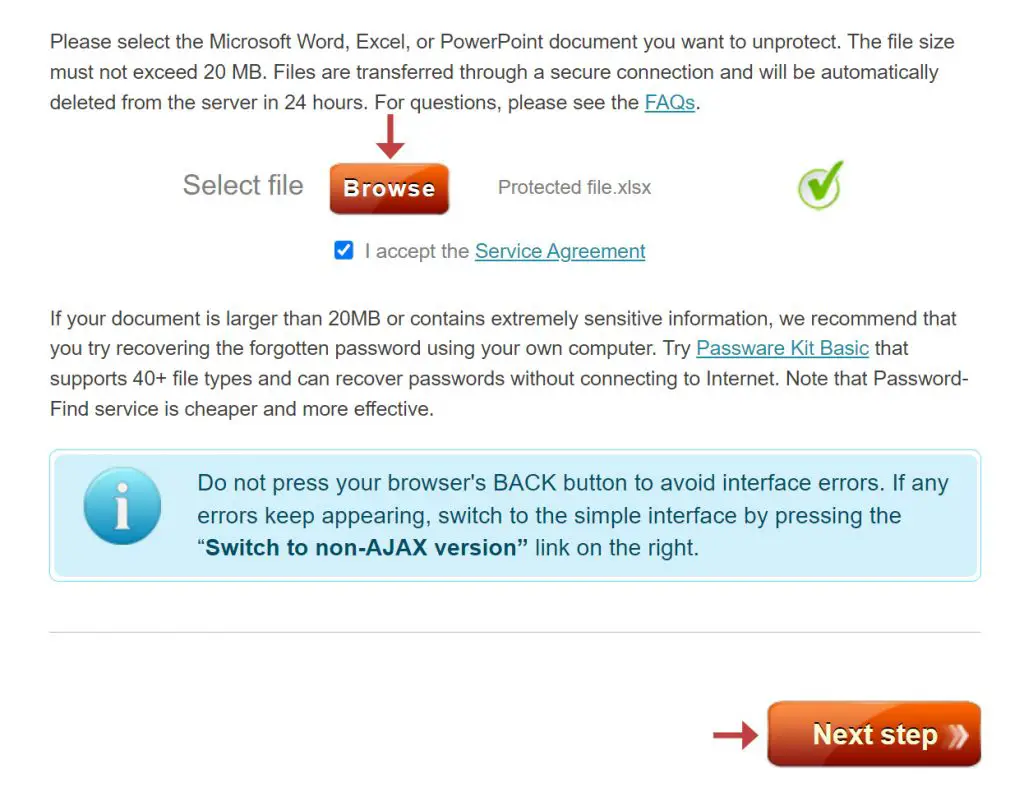
4. In the next screen, you will find two options. To remove the Excel spreadsheet password, select the Remove password option. For the password recovery option, choose Find password.
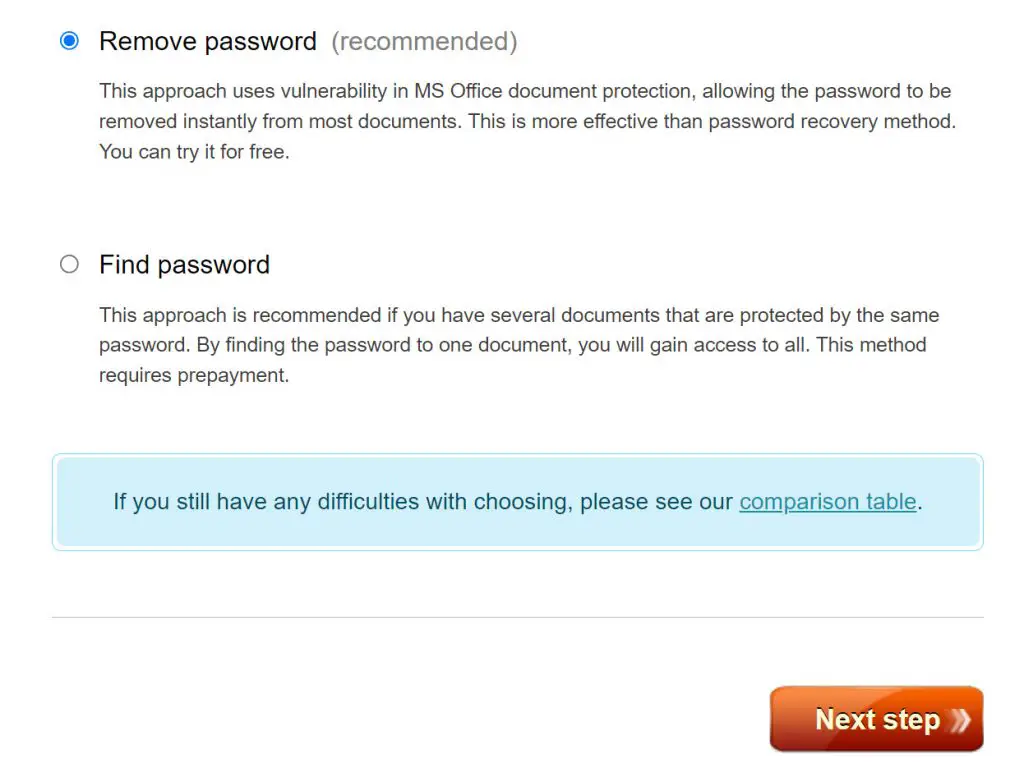
5. Click Next step to remove the password or start the recovery. Removing a password or recovering it may take a while, depending on the password strength.

6. Once complete, you will see the result of the unprotection process. You will get a message when the password is recovered or deleted.
Other online password removal services you can try
If everything else has failed, it can be worth trying the additional services listed below:
How to remove password from Excel workbook using a 3rd Party Software
Whether you remember the password or not, there is 3rd party software you can download and install on your computer to remove passwords from the Excel files. One of these tools is ISeePassword Dr. Excel.
Download the software from this link: https://www.iseepassword.com/online-help/excel-password-recovery.html
The nice part is that ISeePassword Dr. Excel can recover Excel passwords and remove worksheet/workbook protection without damaging the data and works with all versions of Excel files from 2003 to 2021.
Here’s a quick guide on how to recover or remove the workbook password using the ISeePassword Dr. Excel.
Recover open password
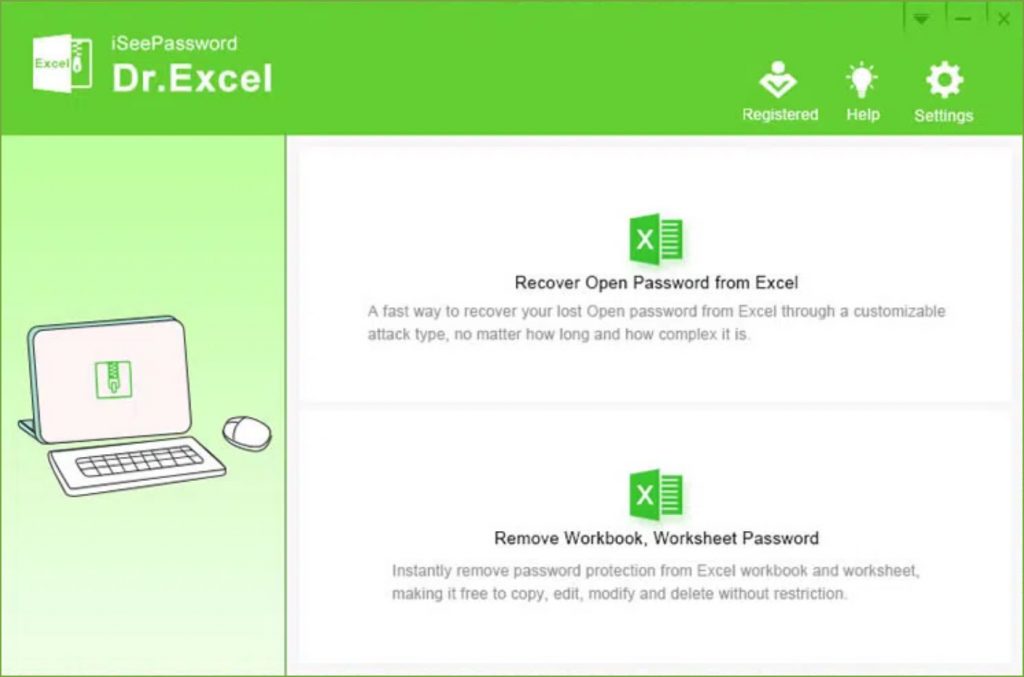
1. Open ISeePassword Dr.Excel from your computer, and click the Recover Open Password from the Excel option on the home screen.
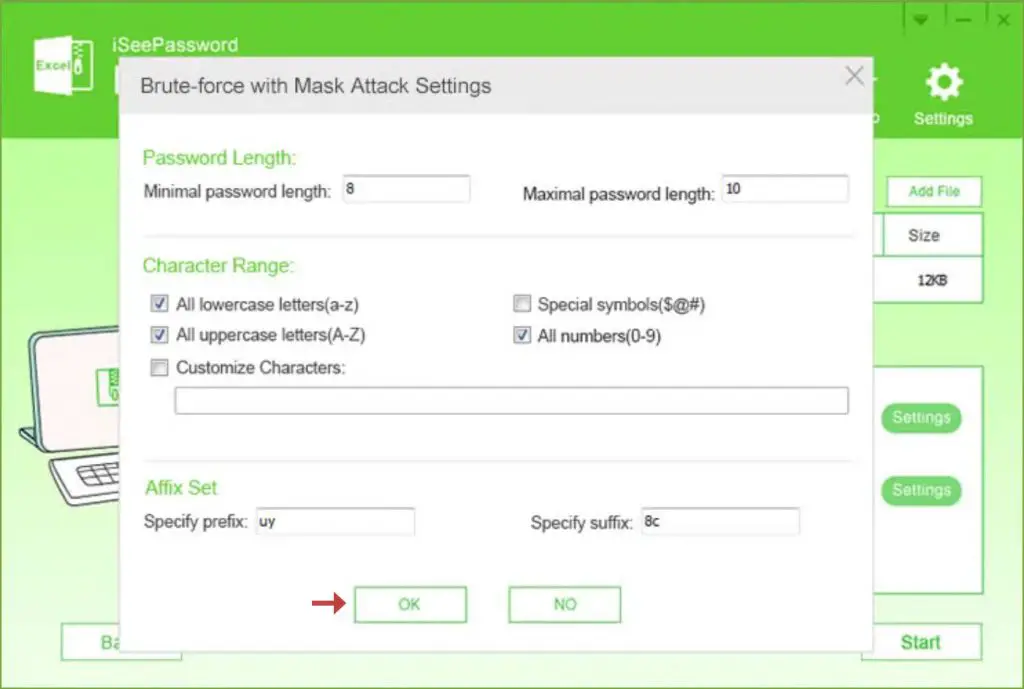
2. Click the Add File button to import the password-protected Excel spreadsheet. Choose the type of attack from the given options: Dictionary Attack, Brute-Force with Mask Attack, and Brute-Force. Select Brute force with Mask Attack as the attack type. This method allows you to set several parameters to shorten the password recovery time.
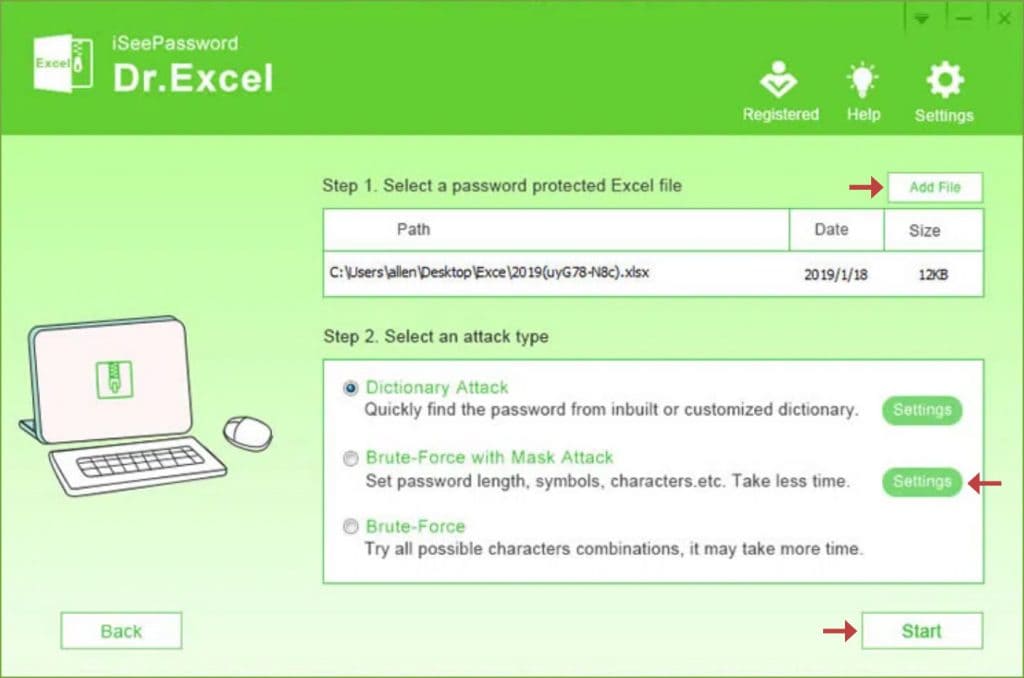
3. Click the Settings button on the right side to set up the proper settings and click Ok.
4. Click Start to recover the Excel password.
A new pop-up window will be displayed once the password is retrieved.
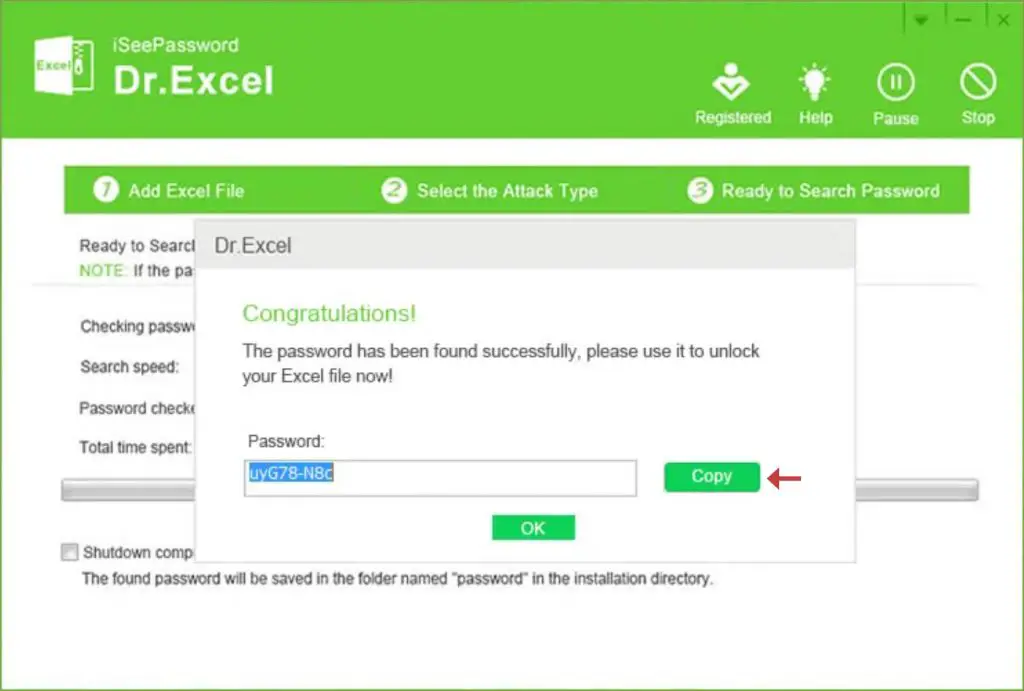
5. Click Copy, and you should be able to open the Excel document with this password.
Remove the password from the Excel document
1. Open ISeePassword Dr.Excel from your computer, and click the Remove Workbook, Worksheet Password option from the home screen.

2. Click the Add File button to import the password-protected Excel file.
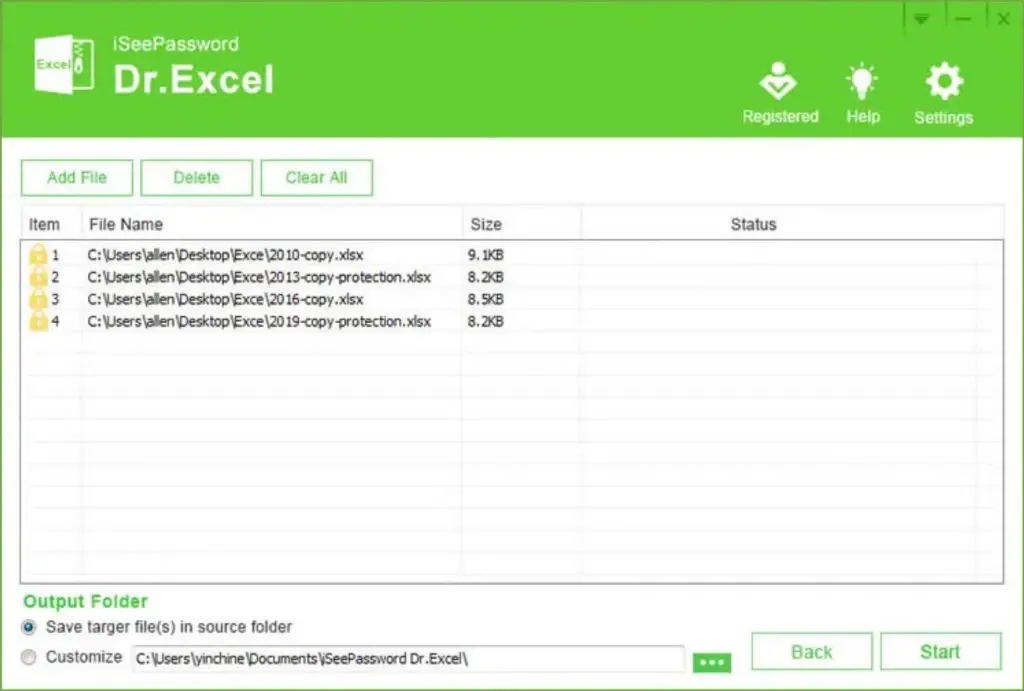
3. Click the Start button to remove the Excel password from the workbook.
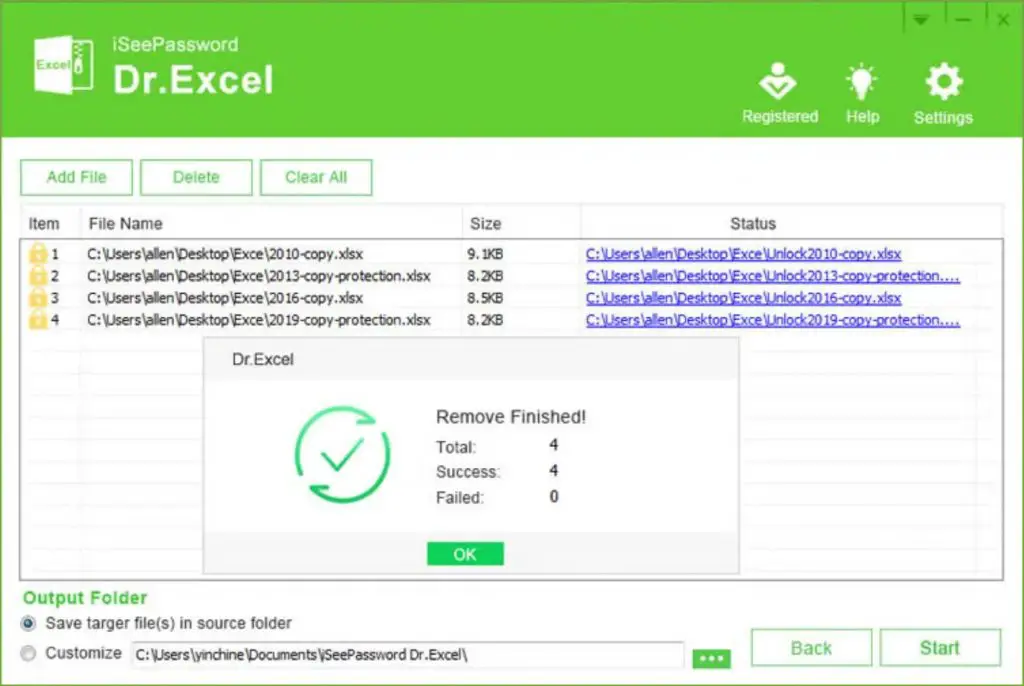
4. Once the password has been removed, you will see a “Remove Finished” message.
Other 3rd party software you can use
If everything else fails, below is a list of additional software you can download and install to recover or remove passwords in Excel spreadsheets:
What to do next?
I hope that after reading this guide, you were able to remove the password from your Excel file. Some methods work better than others, and some may not work on Excel from Microsoft 365 subscription. However, if you have forgotten the password to your precious file, make sure to try the services shown in this tutorial. They could save you countless hours by recovering the open password without damaging your file.
And remember, it’s always wise to make a full backup of your Excel file before attempting to make any changes that could result in data loss.
